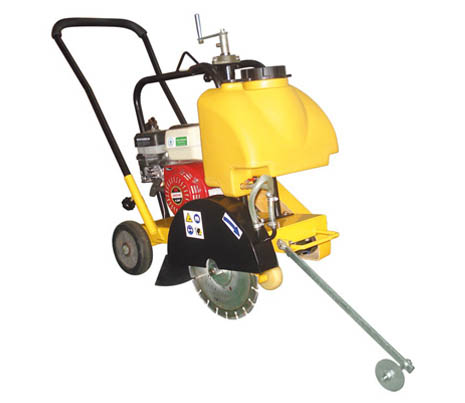
Mastering the full process of replacing concrete saw blades is essential for minimizing downtime and maximizing operational efficiency on your job site. Whether you’re working on municipal roads, precast concrete panels, or asphalt surfaces, understanding the best practices and nuances tied to each scenario enables safer and faster blade swaps. This guide, featuring the T400 Concrete Saw, walks you through practical steps, parameter adjustments, common pitfalls, and maintenance strategies designed to elevate your cutting performance.
Different work environments demand tailored approaches. For instance:
Selecting the appropriate blade and parameter settings such as rotation speed, feed rate, and water flow directly impacts blade life and cut quality.
Follow these core steps for a swift, safe changeover. The T400 model features a rapid-release blade assembly reducing your replacement time by up to 30%, improving jobsite productivity.
Adjusting saw settings aligned with material hardness protects the blade and boosts cutting efficiency:
| Material | Recommended RPM | Feed Rate (mm/s) | Water Flow (L/min) |
|---|---|---|---|
| Hardened Concrete (Road Repair) | 1400 - 1600 | 3 - 4 | 5 - 6 |
| Precast Panel | 1200 - 1400 | 2 - 3 | 4 - 5 |
| Asphalt | 1600 - 1800 | 4 - 5 | 6 - 7 |
Expert Insight: "Many operators risk severe injury by neglecting to disconnect power before blade changes. Also, failing to check blade rotation direction can cause premature wear or damage." — John Martinez, Senior Field Technician
Additional frequent errors include:
Establish a routine encompassing:
These steps extend your equipment’s service life and reduce unexpected breakdowns.
Besides routine maintenance, leverage inherent product features of the T400 saw like its integrated vibration dampeners. These reduce wear on components by up to 20%, enhancing operator comfort while preserving internal parts.
Additionally, routinely utilize the built-in anti-rust water tank system to prevent corrosion—particularly valuable when working in wet or coastal environments.
The T400’s quick-release design alone reduces your blade replacement downtime by an estimated 30%, effectively boosting your daily output on site.
 388
|
388
|
 Air - cooled vertical gasoline engine
Low - noise design
Precision gear transmission
High - efficiency air filter
Mechanical vibration control
443
|
diesel welding generator maintenance
low oil pressure alarm troubleshooting
AVR voltage regulation system
welding current stability
diesel generator fault diagnosis
35
|
Thrust adjustment device usage
Compaction speed control techniques
Plate compactor operation guide
Soft soil foundation compaction speed adjustment
Concrete subbase compaction parameters
397
|
plate compactor for gravel soil
edge zone compaction
municipal road construction equipment
uniform ground compaction
trench compaction solutions
152
|
concrete cutter selection
pavement cutting equipment performance
adjustable cutting depth
rust-resistant water tank benefits
vibration reduction technology
Air - cooled vertical gasoline engine
Low - noise design
Precision gear transmission
High - efficiency air filter
Mechanical vibration control
443
|
diesel welding generator maintenance
low oil pressure alarm troubleshooting
AVR voltage regulation system
welding current stability
diesel generator fault diagnosis
35
|
Thrust adjustment device usage
Compaction speed control techniques
Plate compactor operation guide
Soft soil foundation compaction speed adjustment
Concrete subbase compaction parameters
397
|
plate compactor for gravel soil
edge zone compaction
municipal road construction equipment
uniform ground compaction
trench compaction solutions
152
|
concrete cutter selection
pavement cutting equipment performance
adjustable cutting depth
rust-resistant water tank benefits
vibration reduction technology


.jpg?x-oss-process=image/resize,h_800,m_lfit/format,webp)